Whether you’ve got a beloved armchair with a mysterious tear, a car seat showing its age, or a sofa that’s seen one too many movie nights, an upholstery repair kit can be the difference between a costly replacement and a satisfying DIY fix. These compact, versatile kits have become a go-to solution for homeowners, hobbyists, and professionals alike, and for good reason. With the right kit in hand, restoring fabric, vinyl, or leather to its former glory is far more achievable than most people think.
What Is an Upholstery Repair Kit?
An upholstery repair kit is a collection of tools and materials designed to fix damage on upholstered surfaces. This includes tears, holes, burns, scratches, fading, and fraying on a variety of materials like leather, vinyl, fabric, and suede.
These kits are typically sold as all-in-one packages and are intended to make repairs accessible without needing professional training. They range from simple patch-and-glue sets to more advanced systems with colorants, heat tools, and bonding compounds.
Understanding what’s inside and what each component does is the first step to getting professional-looking results from a DIY repair.
Types of Upholstery Repair Kits
Not all upholstery repair kits are created equal. Choosing the right type depends heavily on the material you’re working with and the nature of the damage.
Leather and Vinyl Repair Kits
These are among the most popular kits on the market. They typically include a flexible filler compound, color pigments, mixing tools, and applicator pads. The goal is to fill and re-color damaged areas so they blend seamlessly with the surrounding material.
They work well on car interiors, leather sofas, recliners, and office chairs. High-quality kits will include a heat tool or iron patch technique to bond the compound firmly.
Fabric and Textile Repair Kits
Designed for woven materials like cotton, polyester blends, or microfiber, these kits usually include iron-on patches, fabric glue, and thread or needle sets. They’re ideal for fixing snags, frays, or small tears on dining chairs, ottomans, and upholstered headboards.
Some fabric kits also include a pill remover or fabric shaver, which is handy for renewing the overall look of worn upholstery.
Universal Upholstery Repair Kits
Universal kits aim to cover multiple materials in a single package. These are best for people who deal with a mix of surfaces, think a home with leather furniture, fabric car seats, and vinyl boat cushions. While they offer versatility, they may not provide the depth of specialized materials needed for more complex repairs.
What Should a Good Upholstery Repair Kit Include?
When shopping for an upholstery repair kit, quality matters more than quantity. A well-stocked kit should include all the essentials without unnecessary filler items that end up unused.
Here’s what to look for:
- Adhesive or bonding compound: A strong, flexible adhesive that won’t crack or yellow over time.
- Filler compound: Especially important for leather or vinyl, this fills in holes, scratches, or gouges.
- Color pigments or dye: A range of colors or mixable pigments to match your existing upholstery shade.
- Applicator tools: Palette knives, sponge applicators, and brushes for precise application.
- Grain texture sheets: These are pressed onto the repair area while the compound is wet, mimicking the texture of leather or vinyl.
- Patches or backing fabric: Used beneath large tears to provide structural support before filling.
- Sandpaper or prep pads: For smoothing surfaces before application.
- Finishing spray or sealant: Protects the repair from future wear and gives a consistent sheen.
How to Use an Upholstery Repair Kit: Step-by-Step
Using an upholstery repair kit effectively requires patience and preparation. Rushing the process is the number one reason DIY repairs look patchy or uneven.
Step 1: Clean and Prep the Surface
Start by thoroughly cleaning the damaged area with a mild cleaner or the prep solution included in your kit. Remove any dirt, oils, or old adhesives. If dealing with a tear, trim any loose threads or frayed edges with small scissors.
Step 2: Insert a Sub-Patch (for Larger Repairs)
For holes or large tears, slide a fabric backing patch underneath the damaged area using a palette knife or flat tool. Apply a thin layer of adhesive to secure the patch from beneath. This creates a stable base for the filler compound.
Step 3: Apply the Filler Compound
Mix your filler compound or colorant according to the kit’s instructions. Apply thin, even layers over the damaged area, allowing each layer to dry before adding the next. Multiple thin layers always outperform a single thick application.
Step 4: Add Texture
While the final layer is still slightly tacky, press a grain texture sheet over the repair area. Apply gentle, even pressure, either by hand or with a warm iron set to a low heat. This step is what separates a professional-looking result from a visibly patched one.
Step 5: Color Match and Finish
Once dry, compare the repair area to the surrounding upholstery. Apply additional colorant layers as needed. Finish with a protective sealant or finishing spray to ensure the repair holds up to daily use.
Common Mistakes to Avoid
Even with a great kit, there are pitfalls that can undermine your results. Knowing these in advance saves time, money, and frustration.
- Skipping surface prep: Applying compound to a dirty or oily surface leads to poor adhesion and peeling.
- Applying too much filler at once: Thick layers crack as they dry. Always work in thin coats.
- Poor color matching: Take time to mix pigments carefully. Test on a hidden spot first before committing to the repair area.
- Using the wrong kit for the material: A leather kit used on fabric won’t bond properly. Always match the kit to the substrate.
- Ignoring the finishing step: Without a sealant, even a great repair can fade, crack, or peel within weeks.
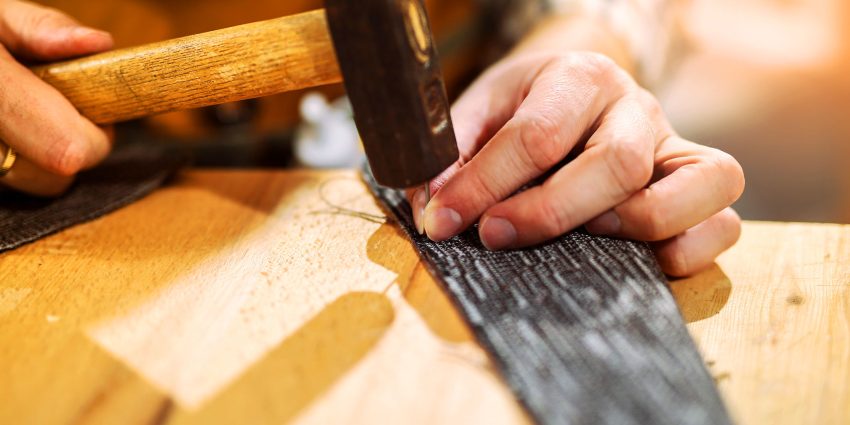
The Role of Proper Tools in Upholstery Repair
An upholstery repair kit provides the materials, but your results are only as good as the tools you use to apply them. Precision tools make the difference between a repair that blends in and one that stands out, in the wrong way.
Many DIYers assume their existing toolbox is enough, but upholstery work often demands specialized instruments designed for fine detail and delicate handling. If you’re serious about getting professional results, it’s worth investing in purpose-built tools. As explored in this guide on the right tool for upholstery work, having the proper equipment can completely transform your output quality, even when using the same repair materials.
Think palette knives with the right flex, applicators that don’t leave streaks, and seam tools that can access tight corners without disturbing surrounding fabric. These aren’t luxuries; they’re essentials for anyone looking to take their upholstery repairs seriously.
Best Scenarios for Using an Upholstery Repair Kit
Upholstery repair kits are incredibly versatile. Here are some of the most common scenarios where they deliver excellent value:
Cracked dashboards, torn car seats, and scuffed door panels are prime candidates for vinyl and leather repair kits.
Sofas, armchairs, and ottomans see heavy daily use. Repair kits extend their lifespan significantly.
Fabric or vinyl dining chair seats are easy DIY candidates and great for beginners.
UV-damaged or water-worn vinyl on boats and patio furniture can be refreshed with the right repair kit.
How to Choose the Right Upholstery Repair Kit for Your Needs
With so many options available, from budget sets to professional-grade systems, finding the best upholstery repair kit means asking the right questions before you buy.
Consider the Material First
Leather, vinyl, and fabric each require different compounds and bonding agents. Buying a kit specifically formulated for your material ensures better adhesion, more accurate color matching, and longer-lasting results.
Assess the Damage Severity
Small scratches or surface scuffs need minimal intervention; a basic touch-up kit may suffice. Larger tears, deep gouges, or widespread fading call for a more comprehensive repair system with structural support materials and multiple color options.
Look at the Color Range
If your furniture is an unusual shade, look for kits with mixable pigments rather than fixed color options. Kits that include multiple base colors and a mixing guide give you the best chance of a seamless blend.
Check User Reviews for Longevity
A repair that looks great on day one but fades or cracks within a month is a wasted investment. Prioritize kits from reputable brands with reviews that mention durability over time, not just initial results.
When to Call a Professional Instead
Upholstery repair kits are powerful, but they’re not a cure-all. There are situations where professional intervention is the smarter choice.
- Extensive structural damage to cushion foam or springs beneath the fabric
- Large areas of complete material loss (rather than surface-level tears)
- Antique or high-value furniture where incorrect repairs could reduce worth
- Complex pattern matching on custom or designer upholstery
In these cases, a skilled upholsterer will have the materials, tools, and expertise to restore the piece properly and protect your investment in the long run.
Maintaining Your Upholstery After Repair
Once you’ve completed a repair, protecting that work should be a priority. A little routine maintenance goes a long way toward extending both the repair and the overall life of your upholstery.
- Apply a leather conditioner or fabric protector every few months
- Keep upholstered furniture out of direct sunlight to prevent UV-related fading
- Address new spills and scuffs immediately before they set in
- Use furniture covers or throws on high-traffic pieces to minimize wear
- Vacuum fabric surfaces regularly to prevent dirt from grinding into fibers
Final Thoughts on Upholstery Repair Kits
A quality upholstery repair kit is one of the most practical investments you can make for your home, vehicle, or workspace. With the right kit, the correct tools, and a bit of patience, you can breathe new life into furniture that might otherwise be discarded, saving money and reducing waste in the process.
The key is matching the kit to your specific material and damage type, following the application process carefully, and complementing your materials with proper upholstery tools. Whether you’re a first-time DIYer fixing a cat scratch on the couch or an experienced hobbyist tackling a full chair restoration, the results you achieve will reflect the preparation and care you put in. Start with a trusted kit, take your time, and you’ll be amazed at what’s possible.